How to Install Decals
How to Install Vinyl Graphics

Installing vinyl graphics is simple when you follow the right steps.
Whether you're applying your custom decal to a vehicle, window, or wall
🛠️ What You’ll Need:
-
-
-
-
-
-
-
-
Clean microfiber cloth
-
Spray bottle with mild soap + water
-
Squeegee or credit card wrapped in soft cloth
-
Masking tape (optional for alignment)
-
Patience and a steady hand!
-
-
-
-
-
-
-
📋 Step-by-Step Instructions:
-
-
-
-
-
Clean the Surface:
Make sure the area is dry, clean, and free of wax, grease, or dirt. Use mild soap and water, then dry with a microfiber cloth. -
Position the Graphic:
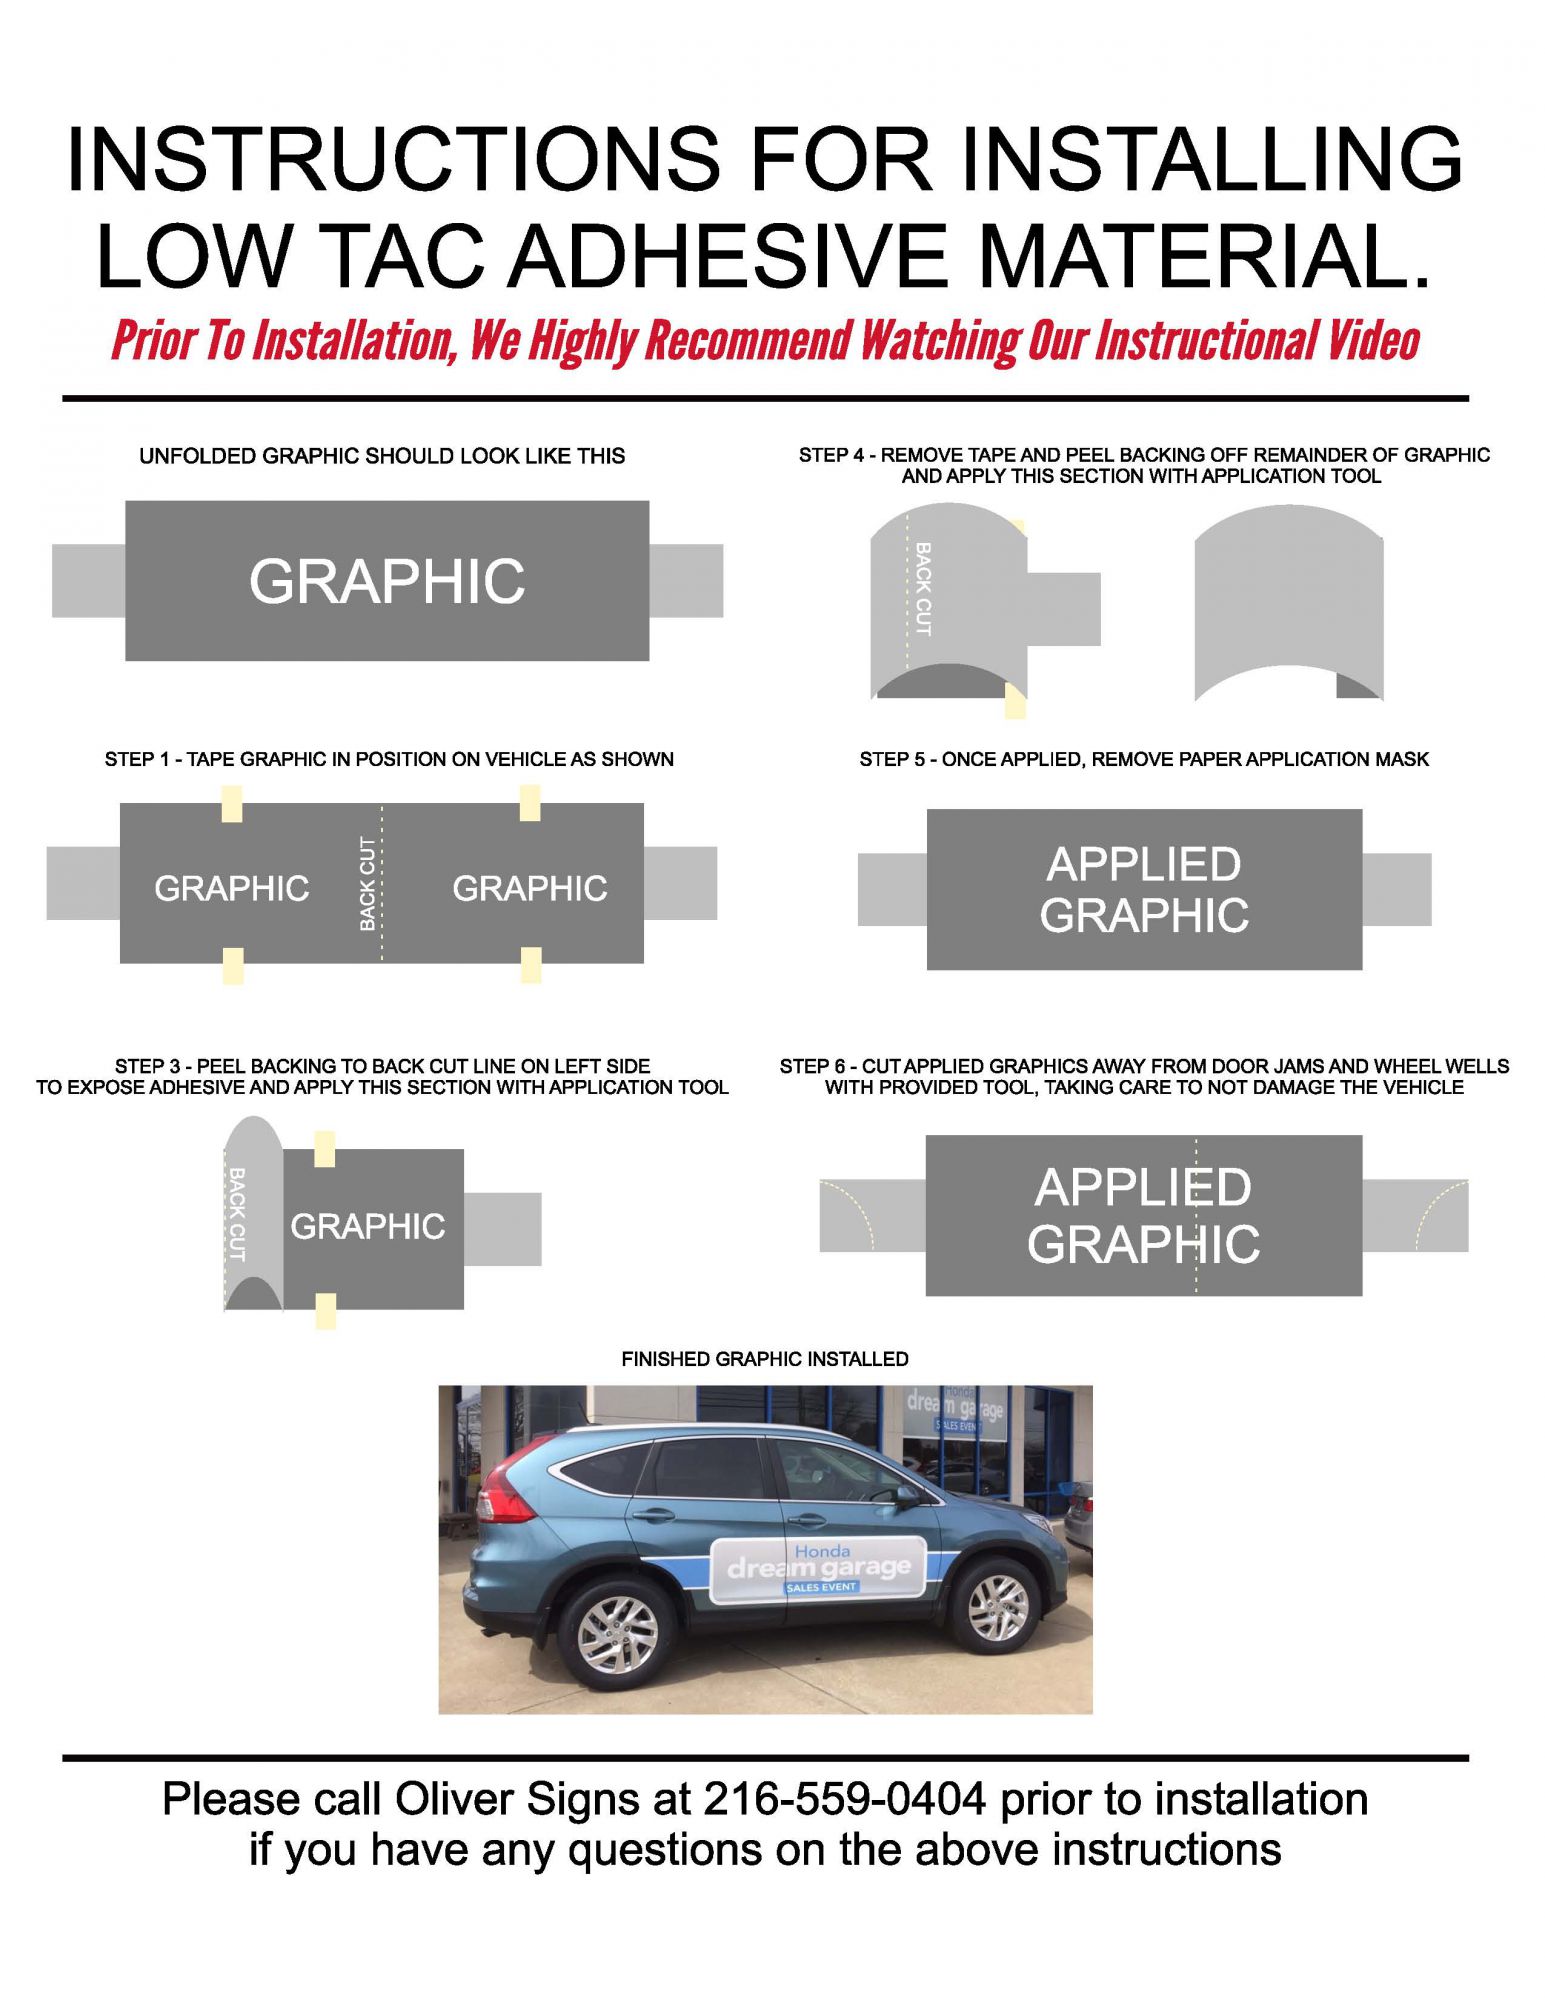
Without removing the backing, place the graphic on the surface and use masking tape to align and mark placement. -
Peel and Stick:
Slowly peel the backing off the vinyl, exposing the adhesive side. Apply from one side to the other, smoothing as you go. -
Smooth It Out:
Use a squeegee or wrapped credit card to push out air bubbles, working from the center out to the edges. -
Final Touch:
If your decal has a transfer tape layer, gently peel it off once the vinyl is fully applied and secure. -
Cure Time:
Avoid washing or getting the area wet for at least 24 hours to let the adhesive set properly.
-
-
-
-
Have questions or need help with installation?
📞 Call/Text us at 216-559-0404
📧 Email: john@oliversigns.com
